Step
Description
1
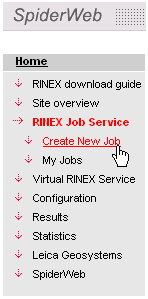
Login to SpiderWeb and go to Jobs - Create New Job.
2
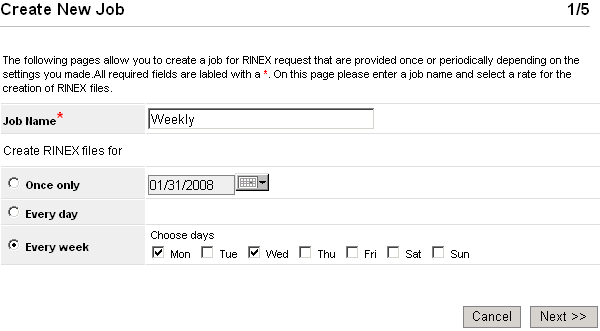
The Create New Job 1/5 page opens:
-
For Once only jobs - no job name needs to be entered, select a date for which RINEX data is to be requested.
-
For Every day jobs - enter a job name.
-
For Every week jobs - enter a job name and choose the week days for which RINEX data is to be provided.
-
For Every week jobs - enter a job name and choose the week days for which RINEX data is to be provided.
-
Select the time period to provide RINEX data.
-
Press Next >>
3
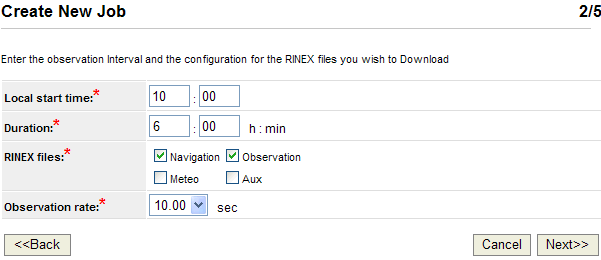
The Create New Job 2/5 page opens:
-
Select the type of the RINEX files to be requested.
-
Set the Observation rate for the requested RINEX files.
-
Press Next >>
4
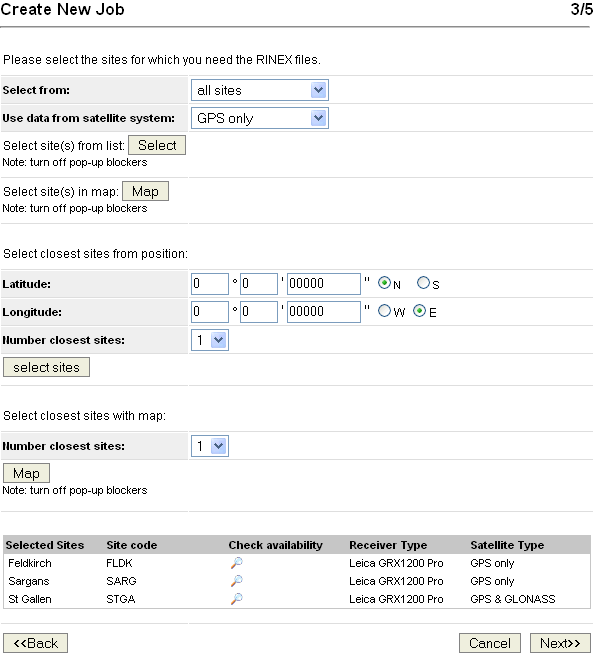
The Create New Job 3/5 page opens:
-
Select from: Select the sites to receive date from either
-
-
from a list of all stations
-
- from a map, showing all stations
-
- by entering a position and having SpiderWeb select a configured number of sites closest to this position
-
- by clicking on a position in a map and having SpiderWeb select a configured number of sites closest to this position
-
-
Use data from satellite system:
-
-
If available, configure to receive RINEX files from GPS only sites or from GPS/GLONASS sites.
-
If configured to receive data from GPS/GLONASS sites, configure if GPS only data is requested or GPS/GLONASS data.
-
Note: GPS&GLONASS sites and data is only available to GPS & GLONASS users.
-
-
Press Next >>
5
The Create New Job 4/5 page opens:
-
If the selected job was not a once only job, an expiry date can be set. Activate the Delete job after expiry date and then select an Expiry Date.
-
If the job is not to expire, skip these settings.

-
Press Next >>
6
The Create New Job 5/5 page opens:
-
The last page lists all settings made in the Job wizard. To change any settings, click <<Back.
7
If all settings are correct, click Submit. SpiderWeb will then redirect to the home page.
8
SpiderWeb will send an Email when the RINEX files are available. Either follow the link in this email or log into SpiderWeb and go to the Results page. All requests and their current status are listed on this page.
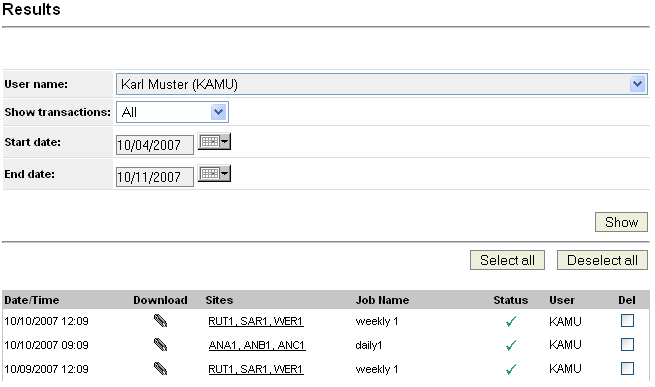
-
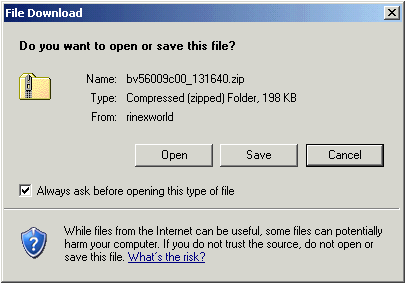
To download the RINEX file, click on the paper clip icon
 . This icon is only available when the RINEX request was successfully processed (shows
  ). Proceed to step 9.
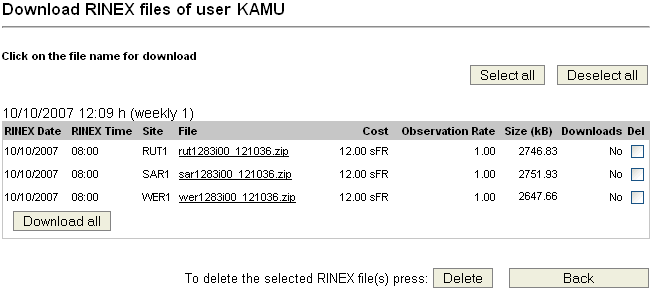
9
When clicking on the paper clip icon, SpiderWeb will redirect to the Downloads area.
-
Click on an underlined zip file name to download the file or click [Download all] to have all zip files from one job and one time period downloaded at once.
10
On the next page, all files contained in the selected zip file(s) are listed.
-
Click on the [Download File] button to download the selected file(s).

11
Store the downloaded data to disk.